Displaying local time
Introduction
In this first part we'll create a view with an SVG that displays the current time of your computer. No controller is needed since we'll use the built-in Javascript functions for getting the current time.
Note
The view and SVG can be downloaded from here but you will still need to follow some of the setup steps for it to work.
Setup
- In InteractiveSVGs, create a new
User Areacalled LocalTime. - Open Folder Views Tool and remove all the default
WidgetsandLink Icons. - Create a new
Link Iconand leave the default name as is (UnnamedLinkIcon_1).
In the File attribute, select Create a new view in this user area..., change the name to LocalTime.Rwav and save the the changes in Folder Views Tool.
Open the newly created view for editing.
- Remove the default elements.
- Add a
Symbolelement with the name LocalTimeSvg.- Set the attribute
Picturesto Area:\LocalTime.svg. - Set the attribute
Appearance/Styleto SVG animation.
- Set the attribute
- Save the file.
- Open the area folder (Ctrl+F8).
- Create a new file called LocalTime.svg.
Note
In your browser, if you navigate to the new User Area, you will not see anything (besides some errors in the console) since we haven't added any content to the SVG yet.
Adding the SVG content
Open LocalTime.svg in your favorite editor and paste the following code. Make sure to save the file when done:
<?xml version="1.0" encoding="UTF-8" standalone="no"?>
<svg xmlns="http://www.w3.org/2000/svg"
     xmlns:xlink="http://www.w3.org/1999/xlink"
     viewBox="0 0 300 300">

  <!-- The text element where the current time is rendered -->
  <text id="currentTime" x="20" y="20" />

  <script id="localTime" type="application/javascript">
    //<![CDATA[
      // The element variable is provided by the Arrigo Web runtime.
      // It has a htmlElement property which we use to get a reference
      // to the svg itself (so we can reference the elements within it).
      const svg = element.htmlElement.querySelector('svg');

      // Grab a reference to the text element using its id.
      const currentTime = svg.querySelector('#currentTime');

      // Every Interactive SVG must define a init(evt) function.
      // init(evt) is invoked by the Arrigo Web runtime when
      // everything is good to go, so use this is the main entry point
      // for setting up all the things you need in your SVG.
      function init(evt) {
        console.log("LocalTime.svg is about to initialize");

        // Invoke renderTime() once directly so we
        // can see a value as quick as possible.
        renderTime();

        // Schedule renderTime to run every second (1000ms).
        setInterval(() => renderTime(), 1000);
      }

      // Grab the current time, format it and set it to the time element.
      function renderTime() {
        // The current time.
        const date = new Date();

        let hour = date.getHours();
        let minute = date.getMinutes();
        let second = date.getSeconds();

        // Add a leading zero if needed using a
        // template literal (template string).
        if (hour < 10) hour = `0${hour}`;
        if (minute < 10) minute = `0${minute}`;
        if (second < 10) second = `0${second}`;

        // Glue the parts together and set is as
        // a new value for the text element.
        currentTime.textContent = `${hour}:${minute}:${second}`;
      }

      // Every Interactive SVG must define a onChanged function,
      // but it's not used in this example.
      const onChanged = function(attributeName, value) { }
    //]]>
  </script>
</svg>
Note
Please note that every Interactive SVG must define a init(evt) and onChanged(attributeName, value) function,
even if they are not used.
If they are not present in the code, the Interactive SVG will not render correctly.
Note
Please note that you cannot bind event listeners on the elements directly, they must be set up in the script code (preferably in init(evt)).
This will will not trigger myFunc():
<text mouseenter="myFunc()"/>
This will work:
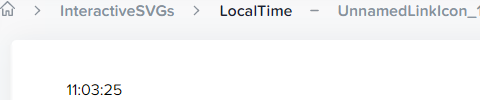
The result
Open your browser and navigate to the area. The first time your view loads it should look like this:
Wait a couple of seconds and verify that the time ticks on:

Quick review
In this part we created our first Interactive SVG. Remember that you must define the init(evt) and onChanged function within the script block of the SVG for everything to work.
Ideas and improvements
One excercise could be to also include the current date in the rendering.
Tip
You can find more information about the Javascript Date object at MDN.
Move on to the next part whenever you feel ready!