Endpoints
The core concept of Endpoints is simply an Oauth2 client application. As for now, only Arrigo Local installations are allowed as an Endpoint definition.
The Endpoint is also a card on the dashboard. If the user, via its access from groups and projects, has access to the Endpoint, the user can click on the Endpoint to directly navigate to that Arrigo Local installation and automatically log in to the system with its ArrigoHome user.
Access control in Arrigo Local
Arrigo Local uses Group membership to determine the access for the ArrigoHome user.
Only access configured on groups are used. All existing users in the Arrigo Local installation are treated as local users exactly as before. A new, temporary user is created for the ArrigoHome user during the session. The temporary user is used for UserLog entries and other audit scenarios.
Create a new Endpoint
- Create an ArrigoHome Endpoint and fill in 'Authorized redirect URI' field to the Arrigo Local server URL
(https://my.domain.com/Arrigo).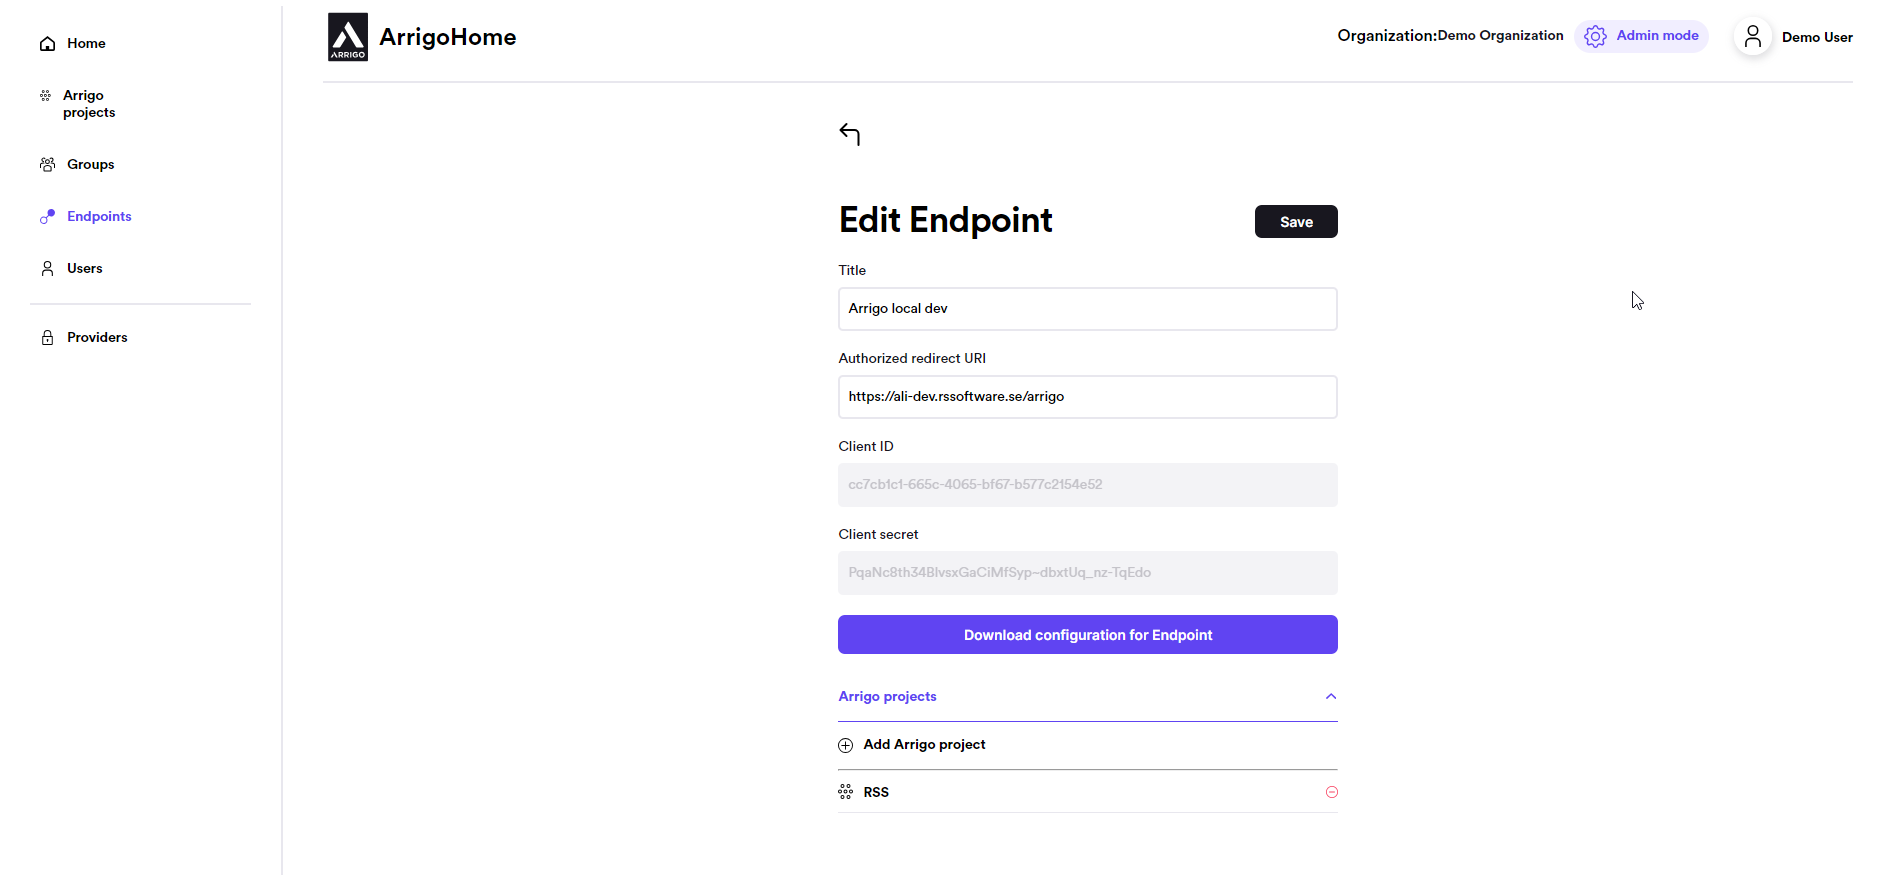
-
Download the configuration files for Arrigo Local by pressing the Download configuration for Endpoint button.
-
Copy the the file
arrigoId.jsonto%ProgramData%\Arrigo\Arrigo Local\settingson the Arrigo Local server. -
Copy the the file
arrigoprojects.jsonto%Proj%\Arrigo\BMSon the Arrigo Local server. -
Restart ArrigoLocal runtime and ArrigoLocalApppool in IIS. Click here to find out how.
The Arrigo Local server is now ready to accept ArrigoHome login requests.
Manage projects for endpoint
Click on + to add a new Project to this Endpoint.
If the project does not yet exist, please add it by following these steps.
Tip
From the project page, the endpoint can be connected to the Project as well.
Delete an endpoint
On the Endpoints page, click on ... for the Endpoint and select Delete. Confirm the deletion in the message box.