Authorization Providers
ArrigoHome relies on Oauth2. Read about everyting about the pattern here.
As for now, there are two types of AuthProviders in ArrigoHome: EmailProvider and Azure AD. The EmailProvider is the standard provider for ArrigoHome. The Azure AD provider connects your organization to ArrigoHome.
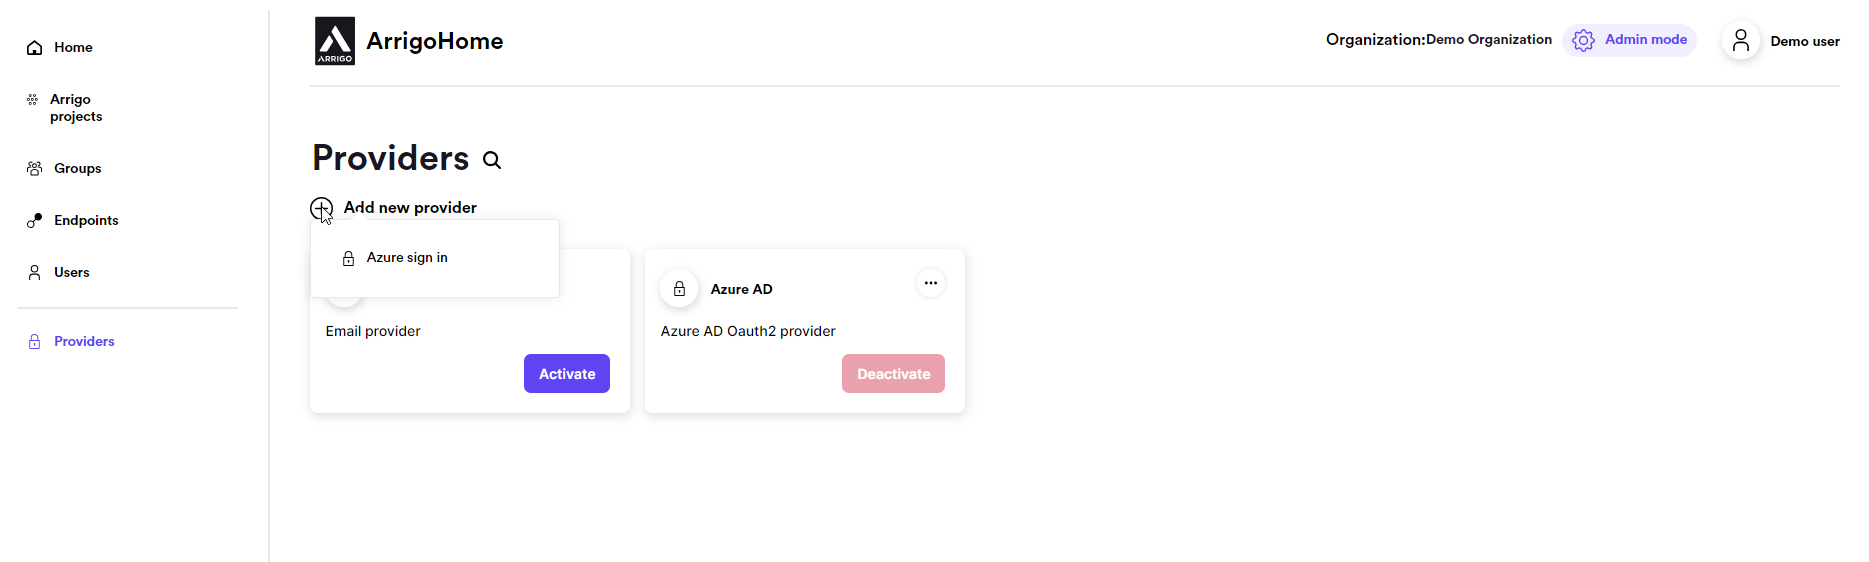
If the Deactivate button of the AuthProvider is Disabled, it is because that provider is used for logging in the current user. This is a security mechanism to ensure there is always at least one AuthProvider enabled.
Email Provider
This provider is always available. It can be Activated or Deactivated. It can not be deleted. It requires an TOTP token application to function. All users connecting with this provider must download and install an authenticator app on their phone. We recommend Microsoft Authenticator. The EmailProvider requires a valid, active email address.
Azure AD
Note
This provider requires access to the organizations Azure Active Directory. Ensure correct privileges or add the IT administrator as Organization administrator in ArrigoHome, and let that person follow these instructions.
ArrigoHome Provider preparation
This provider can be added by logging into ArrigoHome with EmailProvider. Start adding the new provider by clicking the Add new provider button on Providers page.
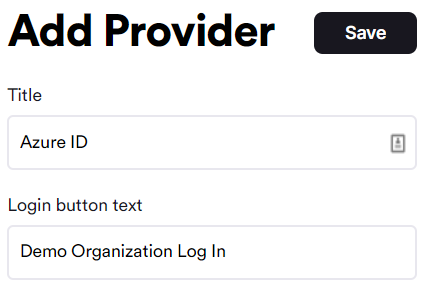
Give the new Provider a Title and a Login button text. The title and description is only shown within ArrigoHome for Organization administrators. It is not shown for any user. Login button text is exactly what is shown on login form button. A text like Login to [organizationName] or similar can be a nice text.
Next step is the preparation in Active Directory for users Access before continue creation of the provider in ArrigoHome.
Azure Active Directory configuration for users access (IT Administrator)
In https://portal.azure.com/ search for "Azure Active Directory", and select your organization.
Next, go to "App Registration" in the left menu, and create a new one.
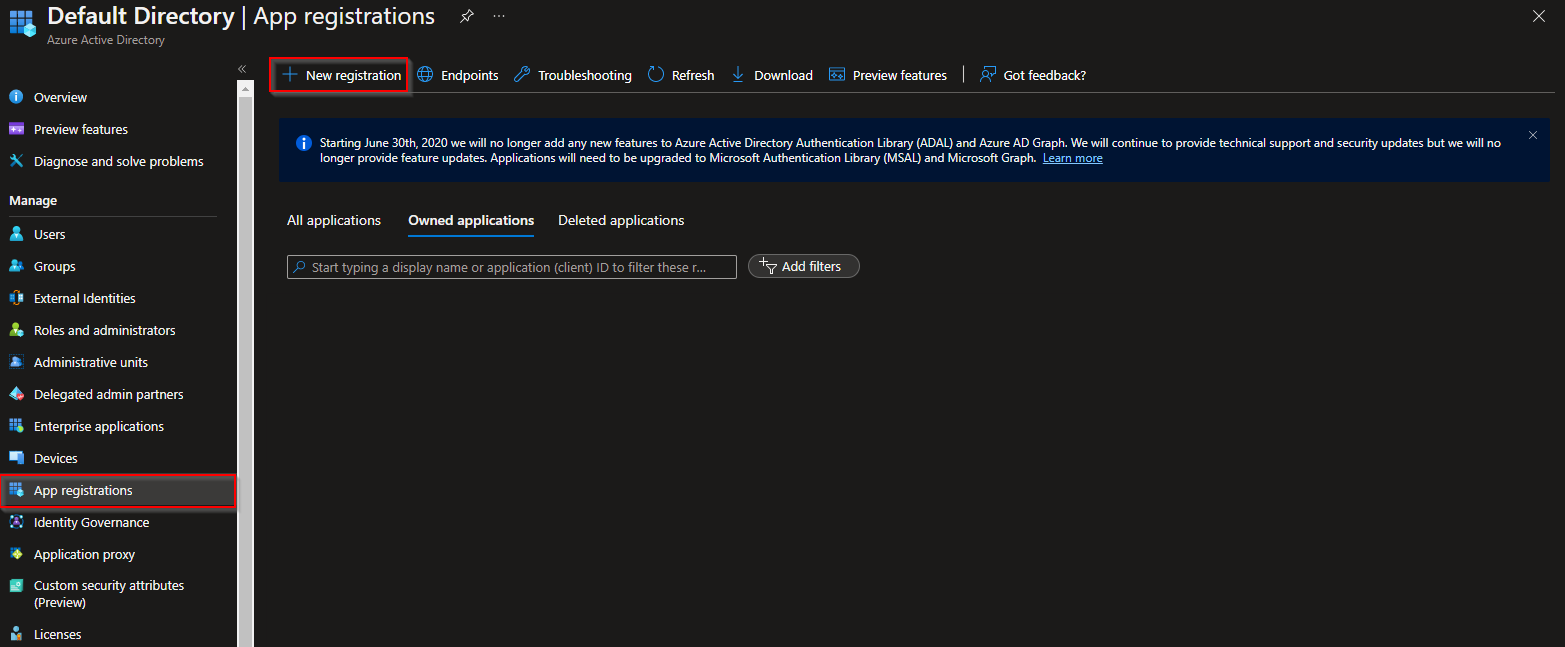
- Click on New Registration.
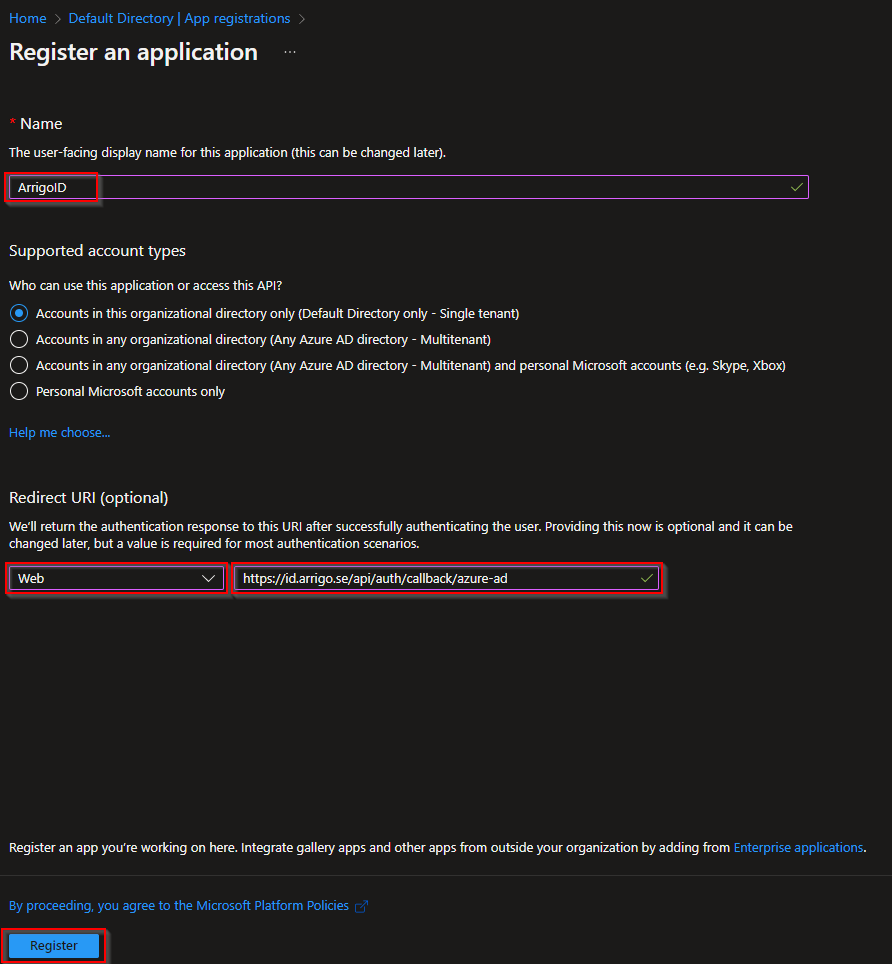
- Pay close attention to "Who can use this application or access this API?" This allows you to scope access to specific types of user accounts. Only your tenant, all azure tenants, or all azure tenants and public Microsoft accounts (Skype, Xbox, Outlook.com, etc.) If you are unsure, select single tenant.
- When asked for a redirection URL, use https://id.arrigo.se/api/auth/callback/azure-ad. Select 'Web' as platform.
-
Click on Register to create the new registration.
-
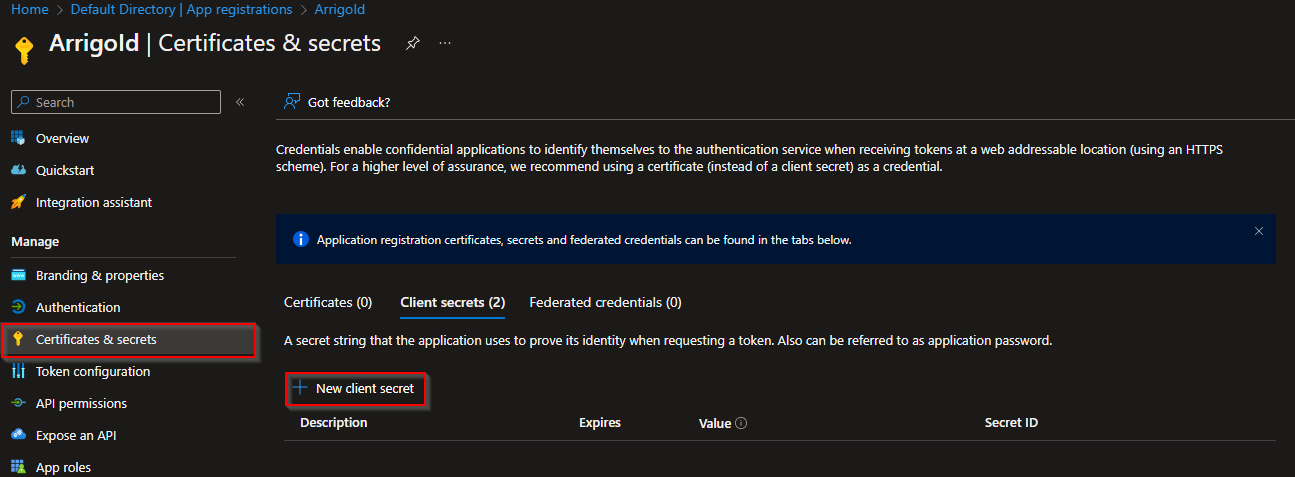
After your App Registration is created, navigate to the Certificates & secrets menu option.
- Create a new secret by clicking on the New client secret
- Enter the secret name.
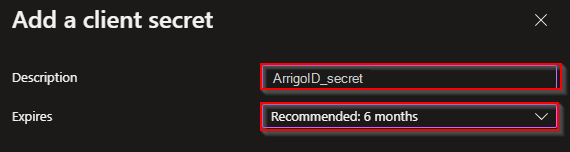
- Click Save/Add. The newly created secret is shown as a value.
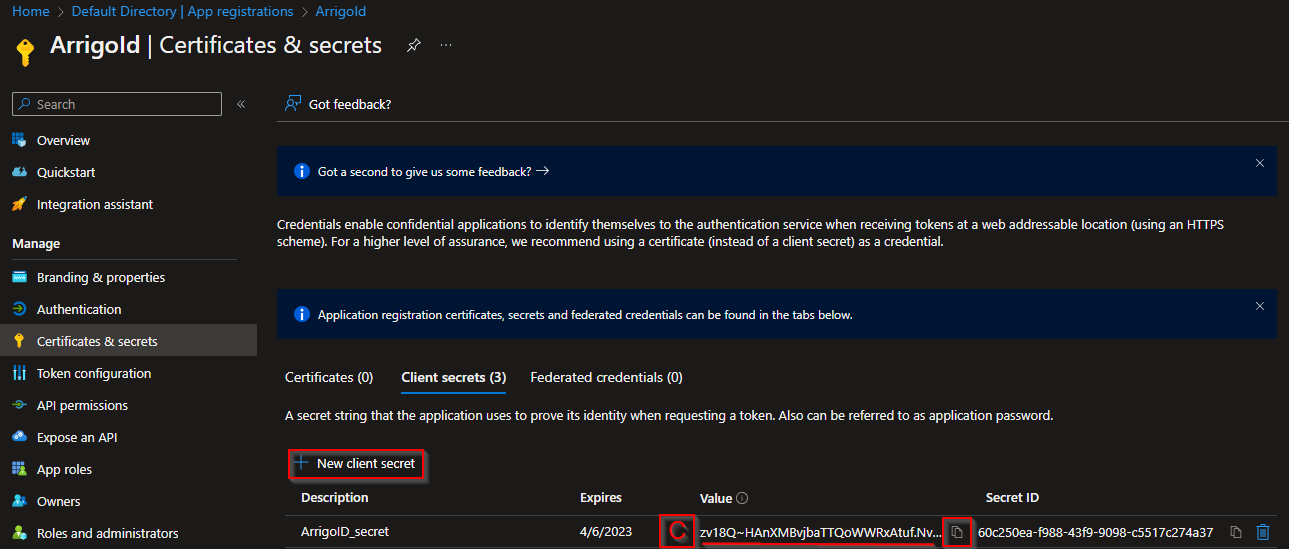
Warning
This value is only shown once! Make sure you have the page open until the Arrigo ID Azure AD provider is finalized and tested!
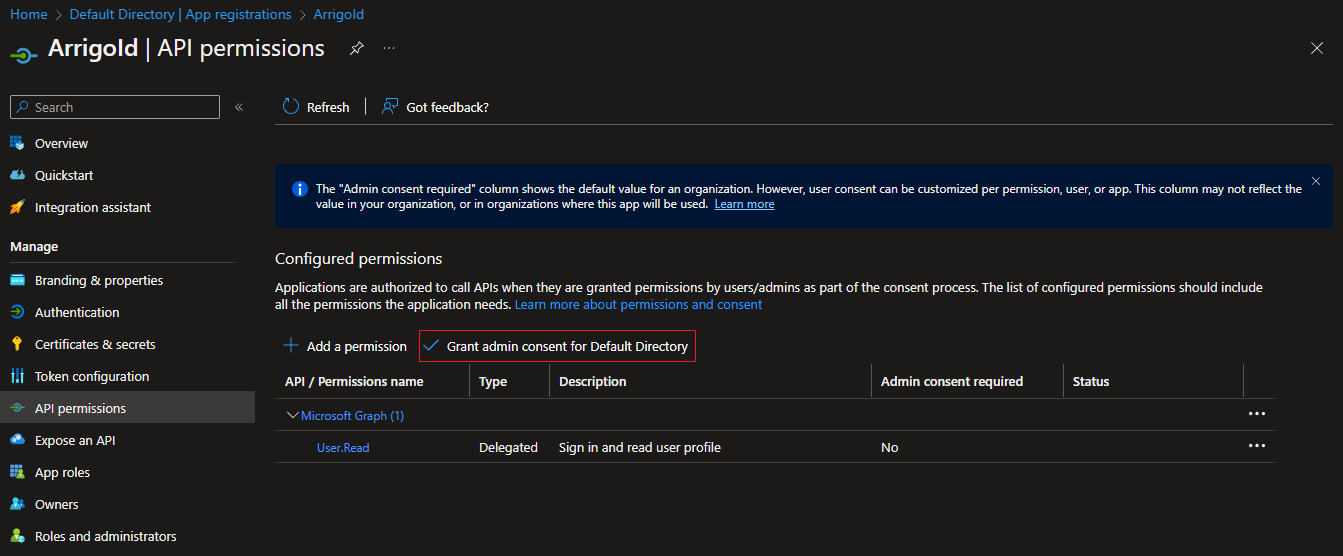
- Click Grant admin consent for Default Directory.
ArrigoID Provider finalization
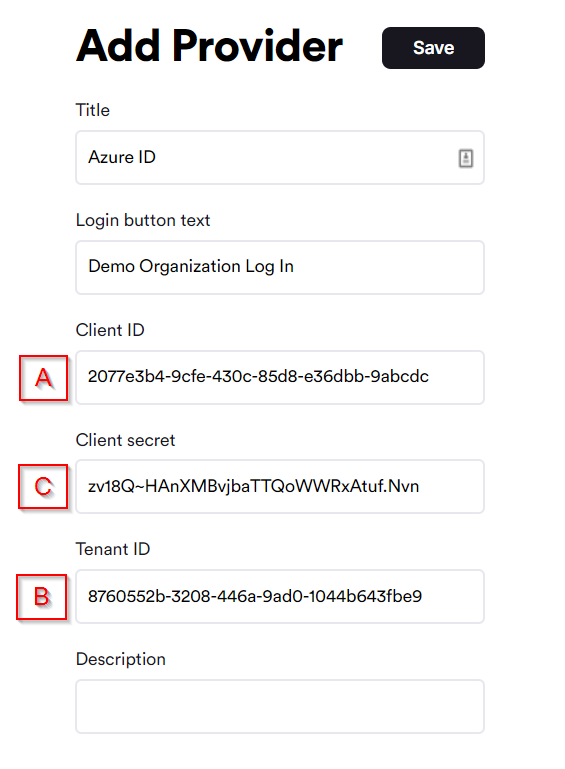
- Copy the following info to ArrigoHome Azure AD provider:
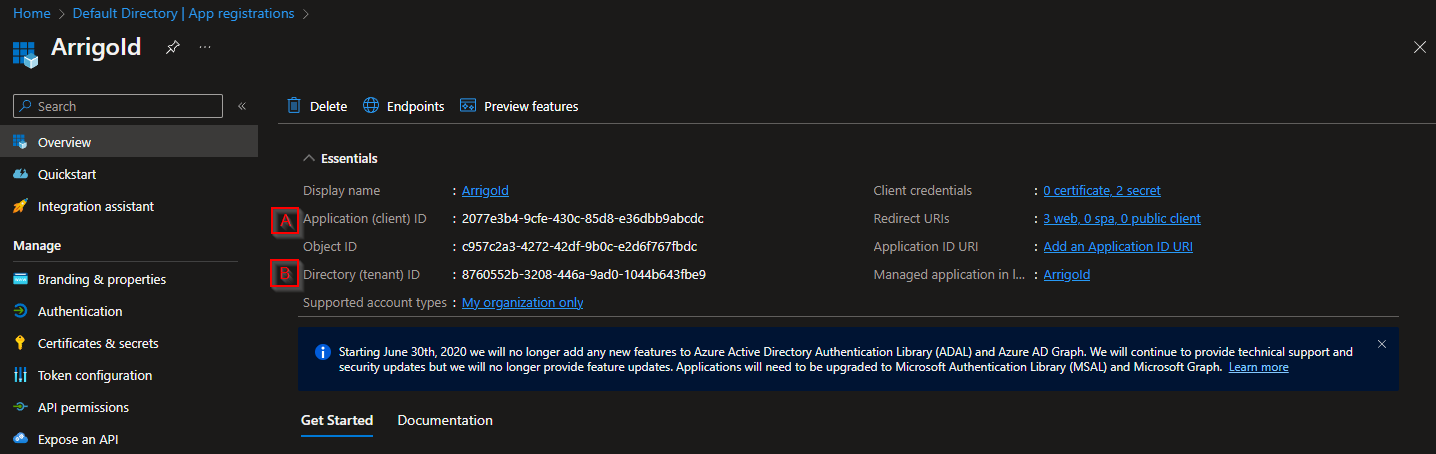
- Application (client) ID (marked with "A" in screenshots)
- Directory (tenant) ID (marked with "B" in screenshots)
- Client secret (value) (marked with "C" in screenshots)
Important
Make sure the correct strings are copied from correct source!
- Click
Save.
Test the Azure AD provider
- Log out from ArrigoHome.
- Enter the organization email address (the same that was used when using EmailProvider)
- Verify that the login button text is correct for the AzureAD provider.
- Click on the provider button.
- Follow the organizations routine for logon (2FA, SMS code or simply username/password)
- Done!
Tip
If the organization should use the Azure AD provider only, simply Deactivate the EmailProvider on the provider page.