Advanced scheduled job example
In this step, you will create a service which fetch the weather forecast on schedule. The result is written to a file in attached project. The contents of the file is read in a view. Compared with this example, the custom service runs in background while the referred example runs when needed in a view. In this way, background tasks of almost any kind can be executed in a controlled way.
Note
A complete example of this view is available here.
Setup
- Open EXOdesigner, select the CustomService folder and open the FolderViewsTool for the folder.
- Add a new link icon. Name it "WeatherForecast" and click the File attribute. Select Create new view in this area..., name the file weatherForecasts.rwav and click ok.
Prepare the custom-service
Inspect the forecast.js file in the custom-services-template project.
getForecast(). The function returns a json object with values.
The main() function calls the forecast function, uses the ENV.projectPath to know where to save the file (in the shared folder).
The file content is written to disk.
At the bottom of the file, the main method is called to trig all functionality.
The script is ready to be called, but something needs to invoke it! It's time for a custom service snippet!
Prepare the project
Open File Explorer of your choise and navigate to the active project.
Navigate to the Arrigo/pm2/snippets folder and create a new file called forecast.snippet.config.js.
Paste the following snippet into the file
| forecast.snippet.config.js | |
|---|---|
What this snippet does
The previous example in this tutorial is based on the idea that a service is always running and ready to respond to calls. The service's lifecycle is managed by the service manager (pm2), which also monitors and restarts the service if it were to crash.
This example, instead, relies on the service starting up, performing its work, and then shutting down.
The service manager ensures that the service starts periodically according to the expression specified in the cron_restart field in forecast.snippet.config.js.
In this example, the expression instructs the service manager to start the service every 30 seconds. If you want to validate this expression, or just experiment with different expressions, there is a nice editor (with examples) available at https://crontab.cronhub.io/.
Note
The expression in this example uses six fields instead of the usual five that you most commonly find in examples.
The 6th field is used to indicate seconds.
Note
In the expression above, */30 means "Every 30 seconds".
If you were to change this to just 30, the meaning of the expression would change to "At 30 seconds past the minute".
In this scenario it doesn't make a significant difference, but it's crucial to note the clear distinctions.
Warning
If you design a service to run, for instance, every 5 seconds, it's essential to ensure that the service completes its tasks within that timeframe.
The cron_restart function not only initiates the service but also restarts it if it is already running.
Prepare the result view
Download the view file and overwrite the one in the CustomService folder.
Open the file from FolderViewsTool and inspect the OnOpen and ServerSideJS attributes on the View element.
- Select the View element, and view the
JavaScripttab. Open the JSEditor for theServerSideJSattribute.
| View - ServerSideJS | |
|---|---|
-Inspect the OnOpen attribute as well
- Save the file. Save the Folder Views Tool.
- Open a browser.
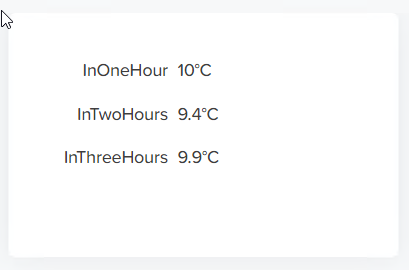
- Login to Arrigo and navigate to the folder CustomService, and click on the link icon for the Forecast.
- After a (very short) time, the values from the json file on disk is displayed in the
Textelements.
Let's go through this in detail.
When the view is about to be displayed,the ServerSideJS is parsed and prepared on the server. The OnOpen code is executed in the browser. The browser connects to the WAMP router on login and can communicate with the back end service network. In the section about SSF you can read all about SSF (ServerSideFunctions).
When the code in OnOpen is executed, a call to the SSF method .getForecast is made and its result should be printed to the console.
When the call to the SSF is made, the file already stored by the custom service (wich runs in background every 30 seconds) is read through the state service and the result is sent as the SSF call result.
Conclusion
In this example we have:
- Downloaded and built a custom-service written in Node.JS.
- Added the scheduled task to Arrigo Local with a service definition snippet file.
- The service fetches (based on cron settings) the forecast periodically and save the contents to disk.
- Consumed the produced file in a view and shown the forecast as a view content.
From here, almost anything is possible (last famous words). It is just a small matter of programming. To get a grasp of which libraries are available, visit npm.org and search for your problem, for example "mqtt client" (hint hint), or "email client"...